In camper construction, every completed chapter is a reason for joy and satisfaction. You’ve already removed the covers and created the “bare” framework for your camper. The electrical installation is also complete, providing you with a livable interior with electricity. Now, it’s time to fill this space with life, and that means delving into furniture construction.
Furniture construction is an exciting step as it rapidly transforms your camper’s appearance and functionality. In this chapter, we’ll cover everything you need to know to build your own camper furniture. We’ll discuss proper planning, the selection of suitable wood, and the right screws. Additionally, we’ll show you how to adapt furniture to the vehicle wall using cardboard templates.
But that’s not all. We’ll also talk about cabinet doors and hinges, explain drawers and heavy-duty slides, and even cover the construction of a pull-out bed with a slatted frame. Your creativity knows no bounds, and we’ll provide you with the tools and knowledge to bring your individual camper design to life.
So, grab your tools, and let’s tackle furniture construction together. By the end of this chapter, you’ll not only have practical furniture in your camper but also feel that your project is taking shape. Get ready for an exciting phase of your camper construction adventure!
Plan Your Furniture Construction
Planning the furniture construction in your camper is an exciting step towards creating your unique mobile home. Here are some essential considerations that can help you during the planning process:
- Functionality:
- Before you start the actual design, think about how you want to use the space. What functions should your furniture fulfill? Do you need storage for clothes, dishes, or sports equipment? Is it a bed, a kitchen, or a desk? The functionality of your furniture should be a top priority.
- Space Utilization:
- Consider the limited space in your camper. Every centimeter counts. Plan your furniture to optimize the available space. Also, ensure that the furniture doesn’t take up too much space, allowing for free movement inside.
- Flexibility:
- Flexibility is crucial since the camper can be used for various purposes. Therefore, design your furniture to be easily modified or adapted, depending on whether you’re traveling alone, with friends, or using the space differently.
- Weight Restrictions:
- Take into account the overall weight of your camper, as this affects material choice and furniture stability. Lightweight construction is often crucial to minimize weight and not affect driving characteristics.
- Material Selection:
- As discussed in detail below, choosing the right material is crucial. Think about which materials are best suited for your needs, considering weight, stability, and aesthetics.
- Design and Aesthetics:
- Your camper is also your home on wheels, so the design of your furniture should match your personal style and create a pleasant atmosphere. Consider colors, surfaces, and details that you like.
- Budget:
- Plan your budget carefully, as furniture construction in the camper can incur costs. Try to stay realistic and prioritize. You can also work in stages if your budget is limited.
- Practicality:
- Keep in mind that furniture construction in the camper can pose some challenges as dimensions and angles are often not perfect. Be prepared to make adjustments and find creative solutions if the plan goes off track.
Achieving millimeter-precision planning in camper construction can be a real challenge for the average person. You can measure as precisely as a professional, but there will likely always be some irregularities and uneven surfaces in the vehicle that throw off your plans.
So, don’t worry if things don’t fit down to the last millimeter. The real magic of camper construction often lies in adapting to on-site conditions and finding creative solutions. When you install your furniture on-site, you can see exactly how much space you actually have and how to best utilize it.
Flexibility and the ability to improvise are essential skills in camper construction. So, be ready to adapt as you go, and you’ll end up with a unique and functional mobile home that perfectly suits your needs.
Suitable Materials for Camper Construction
In camper construction, various materials are used, and the choice often depends on your individual needs, intended use, and budget. Here are some common materials that can be used in camper construction:
- Solid Wood:
- Description: Solid wood consists of continuous pieces of wood and is typically very robust and durable.
- Pros: It gives your camper a warm and natural ambiance, is stable, and can be well processed.
- Cons: Solid wood can be heavy and susceptible to moisture and temperature fluctuations. It can also be more expensive than other materials. Less dimensionally stable, may not be optimal for the entire furniture construction.
- Applications: Solid wood is suitable for tabletops, countertops, and decorative elements.
- Glued Laminated Timber (Glulam):
- Description: Glulam consists of multiple layers of wood glued together, making it more stable than solid wood.
- Pros: It is more stable than solid wood, less prone to warping, and is available in various wood types.
- Cons: It can be more expensive than other wood materials and heavier than some composite materials. May still not be sufficiently dimensionally stable for all camper furniture.
- Applications: Glulam is suitable for tabletops, cabinet doors, and paneling.
- 3-Ply Panels:
- Description: These panels consist of three layers of wood, with the middle layer often made of cost-effective material, surrounded by two thin outer layers of high-quality wood.
- Pros: They are lighter and more cost-effective than solid wood or glulam and still stable. They are less prone to warping. Low susceptibility to cracking, good dimensional stability, and retained solid wood appearance.
- Cons: The visible layer may be thin, limiting processing options. Less robust than plywood panels.
- Applications: 3-ply panels are ideal for cabinet paneling, tabletops, and lighter pieces of furniture.
- Plywood Panels:
- Description: Plywood panels consist of several thin layers of wood glued together in a crosswise pattern, making them especially stable.
- Pros: They are very stable, lightweight, and resistant to moisture and warping.
- Cons: The surface is usually not as attractive as solid wood or glulam.
- Applications: Plywood panels are excellent for furniture construction, cabinet paneling, and are also ideal for roof and floor construction.
- a) Birch Plywood Panels:
- Pros: Impact-resistant and generally more robust.
- Cons: Heavier.
- b) Poplar Plywood Panels:
- Pros: Lighter, ideal for weight-conscious campers.
- Cons: Less impact-resistant, softer material.
- a) Birch Plywood Panels:
- Phenolic Film Faced Plywood:
- Description: Phenolic film faced plywood is specially coated plywood that is extremely weather-resistant and durable.
- Pros: It is extremely durable, waterproof, and resistant to wear. Ideal for outdoor use.
- Cons: It can be heavier and may not have an aesthetic surface.
- Applications: Phenolic film faced plywood is perfect for floor construction, drawers, and other components requiring resilience.
The choice of the right material depends on your specific needs. In most cases, a combination of different materials is used in camper construction to achieve the best results in terms of weight, stability, and aesthetics.
Material Thickness
Choosing the right material thickness is a crucial factor in camper furniture construction, influencing stability, weight, and overall furniture performance. The ideal material thickness depends on various factors, including the type of furniture, intended use, and personal preferences. Here are some considerations for material thickness in camper furniture construction:
- Countertops:
- For countertops, especially in the kitchen, a thicker material thickness of at least 18 to 20 mm is often recommended. This provides sufficient stability for kitchen appliances and food preparation.
- Side Walls and Back Panels:
- Vertical furniture parts like cabinet side walls and back panels often require a material thickness of 12 to 15 mm to ensure stability.
- Bottom Panels:
- For bottom panels of cabinets or beds, a material thickness of at least 15 mm should be chosen to bear the load and prevent sagging.
- Drawers:
- The material thickness for drawer bottoms depends on the planned load. For lighter items, a thickness of 10 to 12 mm is sufficient, while heavy loads may require a thicker option.
- Frame Construction:
- The frame parts holding the furniture structure together should generally have a material thickness of 15 to 18 mm to ensure the required stability.
- Doors:
- The material thickness of doors can vary. Usually, a thickness of 12 to 15 mm is adequate. Thicker options may be necessary for heavy or large doors.
Recommendation for Camper Furniture Construction: For a good balance between stability and weight savings, I recommend using 15 mm thick plywood panels. These panels offer sufficient stability for most camper furniture and are still lightweight enough to keep the overall weight of the vehicle in check. Plywood panels are robust, warp less, and provide a reliable base for camper furniture construction.
Building Camper Furniture: Save Material Thickness with Frame Alternatives
You can also save on material thickness in camper furniture construction by using wood frames. There are both aluminum and wood frames as lightweight alternatives.
Aluminum Plug Systems: These systems consist of aluminum profiles that allow you to quickly and easily assemble the basic structure for your furniture. The aluminum frame is then filled with suitably cut plywood panels. Examples of such systems include Steck + Weg and Alusteck. With these systems, you can create a solid structure while minimizing the material thickness of the cladding, as the aluminum frames take on the main load-bearing capacity.
Wooden Frame as a Lightweight Alternative: Alternatively, you can use a wooden frame as a stable structure for your furniture. You build this frame from wooden slats. Since the wooden frame takes on the main load, the cladding panels, usually plywood panels, can be chosen with a lower material thickness. Here, you can consider material thicknesses of 10 millimeters or even less. This allows you to save weight, which is crucial in camper construction.
It’s essential to note that certain fittings like concealed hinges or other types of hinges require a minimum wood thickness to be securely attached. Before opting for a lighter material thickness, ensure it meets the requirements of the fittings you intend to use.
Choosing the Right Screws
Choosing the right screws is crucial for building wooden furniture in your camper. Here are some recommendations for screws that work well:
Screws with Partial Threads: Screws with partial threads have the advantage of providing better holding power and stability, especially in wooden furniture construction. A screw with partial threads has a section under the head that doesn’t have spirals, and this part is called the shaft. The shaft should be at least as long as the thickness of the piece of wood you want to fasten. This allows the two parts you want to screw together to be securely pulled together.
Partial thread screws come with a countersunk head. There are also other head shapes like a flat head or a hexagonal head with a U-shaped washer. Partial thread screws are perfect for securely fastening wooden boards to wooden beams. This is useful for attaching wood panels to walls or wooden beams for terraces neatly and flatly. If the screw doesn’t have a self-cutting thread, you need to pre-drill a hole.
Screws with Torx Head: Screws with a Torx head have a star-shaped groove and offer some advantages over conventional Phillips or slotted screws. The Torx head allows for better handling as the screwdriver or bit securely fits into the screw head, minimizing slipping or tilting. This is especially handy when working in tight spaces or tightening screws with an electrical screwdriver.
Choosing the Right Screw Length: An important rule of thumb when screwing in wood furniture construction is that the screw length should be about twice the thickness of the wood. This ensures sufficient depth of attachment and stability. For example, if you’re working with 15 mm thick wooden panels, the screws should be at least 30 mm long.
Remember that the choice of the right screws not only affects the strength of your furniture but also its durability and stability. It’s always a good idea to use high-quality screws to ensure that your furniture can withstand the demands of camping life.
In addition to screws, you should also glue your furniture pieces, and here’s the reason:
When building furniture in a camper, different wooden parts often come together, moving during the drive. This movement can cause the wooden parts to rub against each other, creating unpleasant noises like creaking and squeaking. This can not only be annoying but also significantly affect driving comfort.
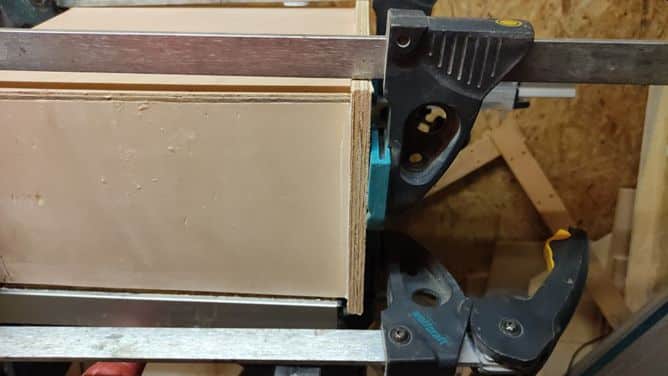
Gluing the wooden parts complements the screws holding them together. While screws ensure structural stability, gluing prevents the parts from rubbing against each other and causing noise. It creates a solid, noiseless connection between the wooden parts, significantly enhancing comfort during the drive.
Overall, gluing camper furniture is a proven method to create a quiet and pleasant environment while driving, ensuring that the furniture remains stable and functional.
Customizing Furniture to Fit the Vehicle Wall
Even if a vehicle appears straight and symmetrical at first glance, there are often hidden irregularities in the body. In the case of our Caddy Maxi, it may seem straight externally, but on closer inspection, you’ll notice that the sides of the body are quite curved. This means that the wall you want to adapt your furniture to is not flat and even. Instead, there are curves, contours, and unevenness that can make fitting furniture a tricky task.
This is where templates come into play. By creating a cardboard template that replicates the exact shape of the body wall, you can capture the actual contours and curves. This allows you to customize furniture pieces to perfectly fit the uneven wall. Trying to install furniture without this adaptation might not only look unappealing but could also be impractical or unstable.
Using templates significantly simplifies the customization and installation process, ensuring that the furniture fits harmoniously into the space while remaining functional. This approach allows you to consider the individual quirks of your vehicle, making the camper conversion a comfortable and aesthetically pleasing space.
Here’s how you can proceed:
- Preparation:
- You’ll need a small wooden rod or a meter stick. Attach a well-marking pen with tape to one end of the wooden rod so that it is perpendicular to the rod.
- Template Creation:
- Start at the top of your vehicle’s ceiling and run the pen along the body wall down to the floor. The pen should be on a large piece of cardboard. As you move along the wall, the pen traces the contours and curves of the body wall onto the cardboard.
- Cutting:
- Cut the cardboard along the traced contours. You now have a template that precisely replicates the shape of the body wall.
- Furniture Adjustment:
- Place the template where your furniture needs to be adjusted to the wall. You can use the template to mark or cut the right cutouts or curves in the furniture pieces. This ensures that the furniture perfectly fits the uneven wall.
This method allows you to precisely and effectively adjust furniture to the vehicle wall without the need for complex measurements or calculations. It’s a practical way to ensure that your camper furniture fits exactly and seamlessly into the space.
Doors for Your Furniture
Attaching doors to cabinets in camper construction requires careful considerations and the right choice of hinges. Here are the steps and considerations to keep in mind:
- Selecting Hinges:
- For camper construction, soft-closing concealed hinges are an excellent choice. These hinges have the advantage of gently closing doors without causing loud slamming noises. This is particularly important in a vehicle, as loud noises during the drive can be disturbing.
- Considering Material Thickness:
- When selecting hinges, it’s essential to ensure that the material thickness of the cabinet doors is sufficient to securely hold the hinges. You should carefully follow the instructions of the hinge manufacturer to determine the correct material thickness.
- Understanding Stop Types:
- Overlay Stop: In this type, the doors overlay on the cabinet frame. This means that the door surface is on the same level as the cabinet frame. This type can save space and is useful when you have limited space inside the cabinet.
- Inset Stop: Here, the doors are set inside the cabinet frame and are not visible when closed. This gives the furniture a clean and unobtrusive look. Inset stops are often the choice when a smooth external surface is desired.
- Center Wall Stop: This is a special stop type where the doors are hinged in the middle of the cabinet frame. They open in the middle, providing access to both sides of the cabinet. This can be practical when you want to use different areas of the cabinet separately.
The choice of the right stop type depends on your individual needs and design preferences. Ensure that the hinges and doors match well to ensure smooth functionality and an aesthetically pleasing appearance.
An alternative to using handles, as with conventional doors, are Push-Lock furniture locks. These locks provide a convenient way to securely close cabinet doors without the need for handles. Here’s how they work and why they can be a good choice:
How Push-Lock Furniture Locks Work: Push-Lock furniture locks are typically housed in a flat, rectangular casing that is installed in the cabinet or drawer. They consist of two main components: a latch and a push button.
- Latch: The latch is a movable rod or bolt that locks into the locking housing to secure the door or drawer. This latch is usually spring-loaded and keeps the door closed.
- Push Button: The push button is a small control element mounted on the surface of the door or drawer. Pressing the push button releases the latch, allowing the door to open. When you close the door, the latch automatically engages.
Advantages of Push-Lock Furniture Locks:
- Aesthetics: Push-Lock locks do not require visible handles or knobs on the surface of the furniture. This allows for a sleek and clean appearance of the furniture.
- Security: These locks provide a reliable security feature to protect the contents of cabinets or drawers from unauthorized access.
- Ease of Use: Opening and closing doors or drawers with Push-Lock locks is easy and requires minimal effort. A gentle press on the push button is sufficient.
- Space Saving: Since no handles or knobs are needed, Push-Lock locks save space and prevent items from getting caught on handle corners.
Push-Lock furniture locks are particularly useful if you prefer minimalist or modern furniture design while still needing a secure storage solution. They are available in various designs and can be easily integrated into your furniture. However, note that installation requires some careful planning to ensure that the locks are correctly positioned and function flawlessly.
🚐 Welcome to Your Ultimate Camper Building Experience! 🌟 Dreaming of building your own camper and experiencing the freedom of the road? Want to embark on adventures and unforgettable journeys in your personalized rolling home? You’re in the right place!
Our online camper building course is more than just a course – it’s a ticket to a world of boundless possibilities! We understand how challenging it can be to visualize everything with just text and static images, especially in furniture construction. That’s why we’ve taken this course to the next level by incorporating immersive 360-degree images and inspiring videos. This means you won’t just read about building furniture – you’ll feel like you’re right there.
Here’s what you can expect from our camper building course:
🛠️ Camper Building in Perfection: We guide you through every step, from planning to execution. Building furniture becomes a breeze when you follow our detailed instructions. But it’s not just about furniture – we explain the entire interior construction, including electrical work, insulation, and window installation.
📹 Game-Changing Videos: Our videos aren’t just informative; they’re captivating and entertaining. You’ll see furniture and other interior elements come to life in real-time, allowing you to follow each step precisely.
🌍 Explore in 360 Degrees: Immerse yourself in our immersive 360-degree world. Pan your view to examine every angle and detail. It’s like standing inside your future camper!
🤝 A Supportive Community: You’re not alone on your camper building journey. Join our community, ask questions, share ideas, and get valuable advice from like-minded individuals.
Camper building is a journey that takes you not only to exciting places but also to a new version of yourself. It’s time to turn your dreams into reality and experience the freedom only a camper can offer.
And the best part? You can start now with no risk! We offer a generous 7-day free trial. Dive into the course, explore all the amazing content, and ensure this is the right step for you. No commitments, no risks – just pure camper building excitement!
What are you waiting for? Your adventure begins here and now. Enroll in our online camper building course and learn how to bring your dream camper to life step by step! 🚐 🚀
